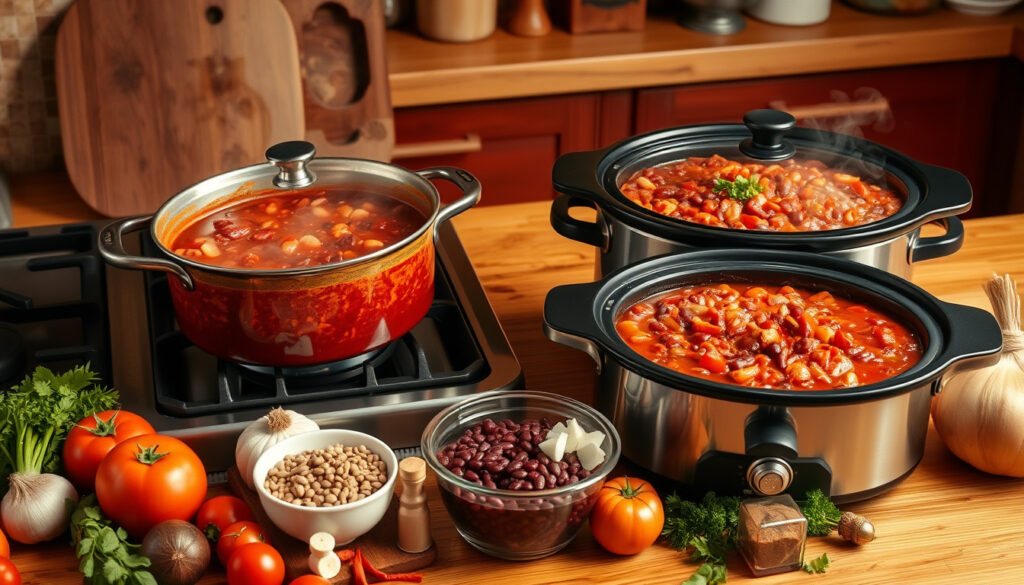
How to Make Chili – Stovetop and Slow Cooker Recipe
Few dishes deliver the combination of warmth, depth, and satisfaction that a well-made pot of chili does. Built on ground beef, beans, tomatoes, and a bold spice blend, chili has evolved from a 19th-century Texas trail food into one of the most versatile and widely cooked dishes in American home kitchens. Whether simmered on the stovetop for a couple of hours or left to slow-cook in a crockpot all day, the result is a hearty, crowd-pleasing meal that only gets better overnight.
The core technique is consistent across the best recipes: brown the meat and aromatics first for maximum flavor, then combine everything and let low, steady heat do the work. Understanding why each step matters — from the Maillard reaction triggered by browning the beef to the natural starch released by unrinsed beans — is what separates a good chili from a genuinely great one.
This guide covers the complete process from scratch, including ingredient ratios, step-by-step cooking instructions, a full slow cooker adaptation, vegetarian alternatives, and the regional history behind America’s most hotly debated comfort food.
What Ingredients Do You Need for the Best Chili?
15 minutes
2–3 hrs stovetop / 6–8 hrs slow cooker
6–8
Easy
The ingredient list for a classic ground beef chili is short, pantry-friendly, and highly scalable. Grassland Beef’s recipe guide recommends prioritizing grass-fed, lean ground beef alongside a homemade spice mix for the most authentic from-scratch flavor. Fresh or canned pantry staples both work well in this context.
- Browning beef and aromatics first triggers the Maillard reaction, producing flavor compounds that don’t develop during boiling or slow cooking alone.
- Lean ground beef — 85/15 or 90/10 — reduces greasiness without sacrificing richness.
- Skipping the bean rinse retains natural starches that help thicken the chili organically as it cooks.
- Low, extended heat allows all components to fully meld — shorter cook times yield noticeably flatter flavor.
- Spices should be tasted and adjusted after cooking, since heat concentration alters the balance during a long simmer.
- Chili improves significantly overnight as spices continue to bloom and liquid redistributes through the beans and meat.
- Small additions such as cocoa powder or molasses add smokiness and subtle sweetness without an obvious flavor signature.
| Ingredient | Amount (Serves 6–8) | Role in the Recipe |
|---|---|---|
| Lean ground beef (90/10 preferred) | 1–2 lbs | Primary protein and flavor base |
| Onion | 1 large, chopped | Aromatic foundation |
| Bell peppers (red or yellow) | 1–2 peppers | Sweetness and body |
| Garlic cloves | 2–4, minced | Depth and savory pungency |
| Kidney or pinto beans | 1–2 cans (15 oz), drained — not rinsed | Texture, fiber, and natural thickening |
| Diced tomatoes | 2 cans (15 oz), with juice | Acidity and liquid base |
| Tomato sauce or purée | 1–2 cans (10–15 oz) | Richness and smooth consistency |
| Beef stock or water | 1/3–1 cup | Deglazing and moisture control |
| Chili powder | 1/3 cup | Primary heat and signature flavor |
| Ground cumin | 2 Tbsp | Earthiness and warmth |
| Garlic powder | 1 Tbsp | Layered savory depth |
| Salt | 1–1.5 tsp | Overall seasoning balance |
How to Make Chili: Step-by-Step Recipe
The method that consistently produces the best results involves a two-stage approach: building flavor on the stovetop, then finishing with a long, low cook. Real Food Whole Life and other leading recipe sources agree that skipping the browning step produces noticeably flatter, less complex chili — a shortcut that costs more than it saves.
Building the Flavor Base
Heat a thin layer of oil in a large skillet over medium-high heat. Add the chopped onion and bell pepper and cook for 3–5 minutes until softened. Stir in the minced garlic and cook for another 60 seconds until fragrant.
Add the ground beef along with 1/2 teaspoon of salt. Break the meat apart with a wooden spoon and brown it fully — approximately 5–6 minutes. Drain any excess fat if using fattier beef. Deglaze the pan with a splash of beef stock, scraping up the browned bits stuck to the bottom.
The Maillard reaction — the chemical process triggered when proteins and sugars meet high, dry heat — generates hundreds of flavor compounds that simply don’t develop in a slow cooker’s moist environment. Browning the beef in a separate skillet before adding it to the main pot is the single most impactful technique for achieving deeper, richer chili.
Combining Everything in the Pot
Transfer the browned beef and vegetable mixture to a large, heavy-bottomed pot or slow cooker insert. Add the drained beans, diced tomatoes with all their juice, tomato sauce, all measured spices, and the remaining beef stock. Stir everything together thoroughly to distribute the spices evenly.
For stovetop preparation: bring the mixture to a gentle boil, then reduce heat to low. Cover the pot partially and simmer for at least 1–2 hours, stirring occasionally. The longer it holds at a low simmer, the more thoroughly the flavors integrate.
Finishing and Final Seasoning
Once cooking is complete, taste before adding anything. Adjust with more chili powder for heat, additional salt for balance, or a small amount of sugar to counter excessive acidity from the tomatoes. Preppy Kitchen recommends a final 10–20 minute uncovered simmer if the chili remains too thin, allowing excess liquid to evaporate naturally without altering the spice balance.
Classic toppings include shredded cheddar, sour cream, sliced avocado, fresh cilantro, and diced jalapeños. Cornbread alongside is the most traditional accompaniment.
How Long to Cook Chili and the Pro Tips That Actually Work
Timing is one of the most consequential variables in chili. The minimum viable stovetop cook after browning is around one hour, but two to three hours produces noticeably improved depth. Slow cooker methods extend that window further, with the longest cooks yielding the most cohesive flavor.
Stovetop Timing vs. Slow Cooker Timing
On the stovetop, a one-hour simmer after browning is the floor, not the target. Two to three hours is the practical sweet spot for most home cooks with a standard weeknight schedule. The slow cooker operates differently: six to eight hours on the low setting produces the deepest flavor, while three to five hours on high works when time is limited. Beef tenderizes most effectively at low, sustained heat rather than high heat over a shorter window.
How to Thicken Chili Without Cornstarch
Chili thickens naturally through two mechanisms: evaporation and the starch released by beans — which is why not rinsing them before adding is important. For a batch that remains too liquid, three reliable approaches exist. Mash a portion of the beans directly in the pot using a fork or potato masher. Stir in a slurry of masa harina — two tablespoons mixed with a small amount of cold water — during the last 30 minutes. Or simply remove the lid and simmer on low for 10–20 minutes post-cook to reduce the excess liquid.
Masa harina is finely ground, nixtamalized corn flour — the same base used for corn tortillas. Two tablespoons stirred into simmering chili adds body and a subtle corn-forward flavor that complements the spice profile without overpowering it. It is considered a more traditional thickener than cornstarch for this dish.
The Overnight Advantage and Make-Ahead Value
Multiple tested recipe sources confirm that chili tastes measurably better the following day. Overnight resting allows spices to continue blooming, fat to redistribute evenly, and the liquid to further absorb into the beans and beef. Chili is explicitly designed as a make-ahead dish because of this quality. It also freezes well, maintaining flavor and texture for several months in an airtight container.
Unlike stovetop pots, slow cookers trap steam and allow almost no evaporation. Adding too much liquid at the start produces a watery chili that doesn’t thicken naturally during the cook. Starting with approximately 1/3 cup of beef stock and adding more only in the final hour prevents this problem.
Can You Make Chili in a Slow Cooker — and Without Meat?
The slow cooker is one of the most practical tools for chili, particularly for weekday meal prep or large-batch cooking. The process mirrors the stovetop method but concentrates the active work into the first 30 minutes, leaving the cooker to handle the rest unattended.
The Slow Cooker Method, Step by Step
Natasha’s Kitchen and several other tested sources outline a consistent slow cooker approach: brown the beef and aromatics in a skillet first, transfer to a 5–6 quart crockpot, add all remaining ingredients, stir well, and cook on low for 6–8 hours or high for 3–5 hours. Stirring midway through is helpful when possible but not essential to the result.
At the end of the cook time, taste and adjust the seasoning. For a thicker consistency, remove the lid and switch to the high setting for an additional 20–30 minutes, or mash a portion of the beans with a spoon directly in the insert.
Making Chili Without Meat
Vegetarian chili follows the same structural logic, with plant-based proteins replacing ground beef. Wyse Guide’s slow cooker chili and Real Food Whole Life both recommend using two to three cans of lentils, black beans, or plant-based crumbles such as Beyond Meat. Mushrooms or extra bell peppers add umami depth and textural variety that partly compensates for the absence of meat.
The spice blend and cook times remain unchanged from the beef version. Mashing half the beans at the end gives vegetarian chili a heartier, more substantial texture. Nutritionally, the vegetarian version drops fat to approximately 10 grams per serving while keeping fiber and protein high from the legumes.
This recipe relies on several canned ingredients — beans, tomatoes, and sauce. If a can opener isn’t readily available during prep, How to Open a Can Without a Can Opener – Safe Tested Methods covers practical and tested alternatives.
The Full Chili Timeline: From First Chop to Final Bowl
Breaking the process into a clear sequence helps manage timing, especially when cooking for a crowd or planning a slow cooker meal around a full workday schedule.
- 0–15 minutes: Chop the onion, bell peppers, and garlic. Measure all spices into a small bowl. Open and drain the canned beans without rinsing, reserving the liquid separately.
- 15–25 minutes: Sauté the chopped vegetables in oil over medium-high heat until softened. Add the ground beef and brown fully, breaking it apart as it cooks. Drain excess fat if using beef with higher fat content.
- 25–30 minutes: Deglaze the hot skillet with beef stock. Scrape up any browned bits from the pan bottom — those carry significant flavor. Transfer the full mixture to a large pot or slow cooker insert.
- 30 minutes: Add all remaining ingredients — beans, diced tomatoes with juice, tomato sauce, all spices, and stock. Stir thoroughly to distribute the spice blend evenly throughout.
- 30 minutes – 2.5 hours (stovetop): Simmer on low heat with the lid partially on, stirring occasionally. A longer simmer consistently produces richer, more fully developed flavor.
- 30 minutes – 8 hours (slow cooker): Cook on low for 6–8 hours or high for 3–5 hours. Avoid lifting the lid frequently, as each opening extends the cook time.
- Final 20 minutes: Taste and adjust salt and chili powder. Thicken if needed using mashed beans, a masa harina slurry, or uncovered simmering.
- Rest before serving: Allow 10–15 minutes off the heat before serving. Refrigerating overnight and reheating the next day further improves the flavor noticeably.
What Is Established and What Remains Genuinely Debated in Chili Making
Certain elements of chili are universally agreed upon across tested recipes and regional traditions. Others remain genuinely contested — particularly along the fault lines of Texas purist versus modern comfort food approaches.
| Established | Still Debated |
|---|---|
| Browning beef before slow cooking adds essential, irreplaceable flavor depth. | Whether beans belong in chili at all — traditional Texas-style chili contains no beans by definition. |
| Chili powder, cumin, and garlic form the core spice triad in virtually all versions. | The preferred heat level varies significantly by region and household, from mild family-friendly to aggressively spiced. |
| Low, extended cooking produces deeper flavor than fast, high-heat methods. | Whether ground beef or chunked beef yields better texture — Texas recipes traditionally prefer larger chunks over ground meat. |
| Chili improves overnight as spices continue to bloom in the resting liquid. | The “secret ingredient” is widely disputed — cocoa powder, molasses, beer, and cinnamon each have committed advocates. |
| Draining fat after browning prevents greasiness in the finished dish. | Whether tomatoes are essential or optional — some regional and traditional styles use only dried chili peppers as the flavor and liquid base. |
Where Chili Comes From and How It Varies Across the United States
Chili originated in 19th-century Texas as “chili con carne” — literally, chili with meat. The dish was popularized by San Antonio’s so-called “chili queens,” street vendors who sold spiced beef stews from open-air plazas across the city. The original version contained no beans, relying entirely on dried chili peppers and beef. According to The Cozy Cook, beans became a later addition as the dish spread geographically and adapted to different regional pantries and preferences.
Regional styles diverge significantly from that Texas foundation. Traditional Texas chili uses chunked beef rather than ground meat, no beans, and a heavy hand with chili powder. Cincinnati chili is an entirely distinct variation — served over spaghetti, seasoned with cinnamon and cloves, and topped with shredded cheddar in a format locals call a “5-way.” Midwest and game-day chili, the style most familiar to a national audience, is bean-heavy, made with ground beef, and designed to slow-cook in large batches for a crowd.
Modern slow cooker recipes blend the classic Texas roots — the beef-forward, spice-centric character — with the bean-inclusive comfort food tradition. This synthesis is what most home cooks encounter today when searching for a standard chili recipe. For those who enjoy other slow, patience-rewarding kitchen projects, the How to Make Sourdough Bread – Step-by-Step Beginner Guide applies the same detailed, step-by-step approach to a different kind of from-scratch cooking.
What Tested Recipes and Experienced Cooks Consistently Say
Across multiple recipe sources, a handful of consistently repeated points of guidance emerge from those who have cooked and refined chili extensively across different methods and occasions.
“Brown the beef separately for the Maillard reaction flavor. Don’t rinse the beans — retain the starch. Add heat via jalapeños or cayenne incrementally and taste as you go.”
“Low and slow is the key to the deepest, most developed chili flavor. Beef tenderizes best when cooked on the low setting for six to ten hours — not rushed on high heat over a shorter window.”
— Consensus from multiple independently tested slow cooker chili recipes
Nutritional estimates from tested recipes suggest that a serving of approximately 1.5 cups from a two-pound beef batch yields roughly 400–500 calories, 25–35 grams of protein, 40–50 grams of carbohydrates, and 15–25 grams of fat. Using 90/10 lean beef keeps individual servings below 500 calories. A fully vegetarian version reduces fat to approximately 10 grams per serving while maintaining high fiber and plant-based protein content from the legumes and lentils.
The Key Takeaways for Anyone Making Chili from Scratch
Great chili comes down to a consistent set of principles: brown the beef before anything else, use lean meat to prevent greasiness, leave beans unrinsed for natural thickening, and give the dish time — at least two hours on the stovetop or six to eight in a slow cooker. Taste and adjust only after cooking, not before. Expect the best bowl the day after it’s made. Whether the protein is ground beef, chunked beef, or a plant-based alternative, chili rewards patience and attention to technique more than any single ingredient — and it remains one of the most forgiving, satisfying recipes a home cook can build into regular rotation.
Frequently Asked Questions About Making Chili
Is chili really better the next day?
Yes, consistently. Overnight resting allows spices to continue blooming and the liquid to further absorb into the beans and meat. Most recipe sources explicitly describe chili as a make-ahead dish because of this improvement. It also freezes well for several months.
What is the secret to genuinely good chili?
Browning the beef before slow cooking is the highest-impact single step. Beyond that, using unrinsed beans for starch, toasting spices, and adding small amounts of cocoa powder or molasses for depth are the most frequently cited contributors to exceptional chili flavor.
How do you thicken chili without cornstarch?
Three reliable methods: mash a portion of the beans directly in the pot, stir in a slurry of masa harina (two tablespoons mixed with cold water) during the last 30 minutes, or simmer uncovered for 10–20 minutes post-cook to reduce excess liquid through evaporation.
What is the best meat to use for chili?
Lean ground beef — 85/15 or 90/10 — is the most widely recommended. It balances flavor and texture without excess grease. Traditional Texas-style chili uses chunked beef rather than ground meat, producing a distinctly different texture and mouthfeel.
Can raw ground beef go directly into a slow cooker without browning?
Technically yes, but the result lacks depth. Browning creates the Maillard reaction and the flavor compounds it produces don’t develop in a slow cooker’s moist, low-heat environment. Nearly all tested recipes strongly recommend browning first for this reason.
How spicy should chili be?
Heat level is personal and regional. The standard approach is to add jalapeños, cayenne, or additional chili powder incrementally and taste as you go. It is significantly easier to increase heat at the end of cooking than to reduce it once it’s been incorporated.
How long does homemade chili keep in the refrigerator?
Stored in an airtight container, homemade chili keeps for approximately four to five days in the refrigerator. Frozen portions maintain quality for up to three months. Reheat on the stovetop over low heat, adding a splash of water or stock if the consistency has thickened too much.
Can chili be made with no tomatoes?
Yes. Some regional versions — particularly traditional Texas chili — use only dried chili peppers rehydrated in beef stock as the liquid base, with no canned tomatoes. The result is a deeper, drier, more intensely pepper-forward flavor profile than tomato-based versions.
More related posts
 Tennessee Volunteers Men’s Basketball – 2024-25 Roster Breakdown
 How Long to Air Fry Chicken Breast: Times by Thickness
 Good Morning Message for Her: Romantic, Flirty & Sweet
 T-Mobile Home Internet 2025: Plans, Pricing, Speeds & Downsides
 When Breath Becomes Air – Summary, Bio, Quotes and Review
 American Airlines Carry-On Size: Full Guide & 2026 Rules
 How to Read Guitar Tabs: A Beginner’s Guide to Tablature
