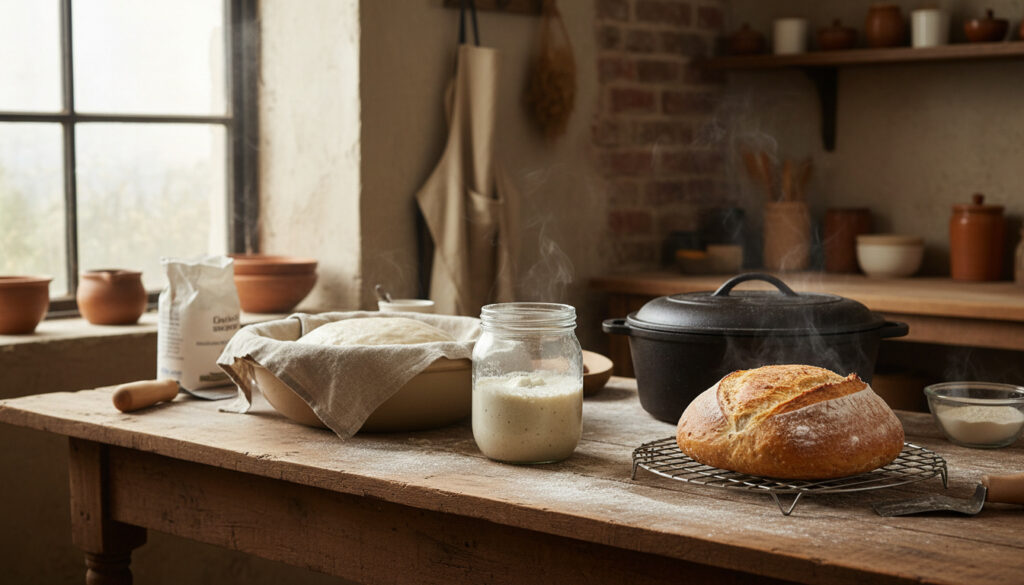
How to Make Sourdough Bread – Step-by-Step Beginner Guide
Sourdough bread represents one of baking’s most ancient traditions, relying on wild yeast and bacterial cultures instead of commercial leavening agents. Creating an active starter from flour and water requires consistent daily attention for five to seven days until the mixture doubles in volume, develops bubbles throughout, and emits a slightly sour aroma at room temperature between 74-76°F.
Unlike bread made with packaged yeast, sourdough demands patience with fermentation timelines that stretch across multiple days. The process involves mixing simple ingredients—flour, water, salt, and mature starter—followed by extended bulk fermentation, careful shaping, and Dutch oven baking to achieve the characteristic crackling crust and open crumb structure.
Beginners should expect their first loaf to take approximately 24 to 48 hours of active time, though most of this requires minimal hands-on work. Success depends more on understanding environmental temperature and fermentation cues than on complex kneading techniques.
How to Make a Sourdough Starter from Scratch
- Natural leavening develops deeper flavor profiles than commercial yeast through slow acidification
- Hydration percentages directly determine final crumb density and openness
- Maintaining a starter requires weekly feeding even when refrigerated to prevent die-off
- Room temperature between 74-76°F optimizes bacterial activity and rise predictability
- Discarding half the starter before each feeding prevents acidic buildup and maintains vigor
- Bread flour with 11-13% protein content provides necessary gluten strength for gas retention
- Dutch oven baking traps steam essential for crust formation and oven spring
| Parameter | Specification |
|---|---|
| Starter Age | 7-14 days |
| Ideal Hydration | 65-75% |
| Bake Temperature | 450°F initial |
| Bulk Ferment Time | 4-8 hours |
| Feeding Ratio | 1:1:1 (starter:flour:water) |
| Maintenance Storage | 38-40°F (refrigerator) |
| Autolyse Duration | 30-60 minutes |
| Proof Time (Room Temp) | 30 minutes – 2 hours |
| Cold Proof Duration | 8-12 hours |
| Internal Doneness Temp | 208°F |
| Cooling Period | 1-2 hours minimum |
To initiate a starter, combine equal parts flour and water—typically 50 grams each—discarding half the mixture before each daily feeding. The Clever Carrot recommends using bread flour or a blend of whole wheat and artisan bread flour for the initial build. Within five to seven days at stable room temperature, the culture should double consistently within four to six hours of feeding.
Once established, maintain the starter using a 1:1:1 ratio weekly when refrigerated. King Arthur Baking suggests activating refrigerated starter with several discard-and-feed cycles at 75°F if bubbles disappear or activity slows.
Best Beginner Sourdough Bread Recipe
Ingredient Ratios
A single loaf requires approximately 900 grams of dough. Alexandra Cooks confirms that using 50 grams of active starter produces milder flavor, while 100 grams increases tang.
| Ingredient | Weight | Baker’s % | Notes |
|---|---|---|---|
| Active sourdough starter (100% hydration) | 50-100g | 10-20% | Ripe and bubbly; use 50g for milder flavor |
| Water | 375g | 75% | Room temperature; adjust +1 tbsp if flour is thirsty |
| Bread flour (or all-purpose) | 500g | 100% | High-protein (11-13%); King Arthur or similar |
| Salt | 11g | 2% | Fine sea salt; add after autolyse |
| Olive oil (optional) | 1-2 tsp | – | For softer crumb |
Mixing and Autolyse
Dissolve the mature starter in room-temperature water, adding optional olive oil if seeking a softer crumb texture. Stir in flour and salt using a fork or spoon until no dry flour remains and the mass appears shaggy. Cover the bowl and allow the dough to rest for 30 to 60 minutes. This autolyse period enables flour hydration and gluten development without mechanical kneading.
Step-by-Step Sourdough Dough Process
Bulk Fermentation
The Perfect Loaf specifies that bulk fermentation at 74-76°F requires four to eight hours total duration. During the first two hours, perform four sets of stretch-and-folds at 30-minute intervals: with wet hands, grasp the dough from the north side, stretch it upward, and fold over the center. Repeat for south, east, and west quadrants. After folding completes, let the dough rest covered until it doubles in size, appears bubbly, and jiggles when the bowl shakes. The poke test—pressing a floured finger into the dough—should show slow spring-back when ready.
Shaping and Proofing
Lightly flour your work surface and scrape the dough out gently. Divide in half if making two loaves. Pantry Mama recommends pulling edges toward the center to form rounds, then resting 20 to 30 minutes uncovered. For final shaping, flour your hands, fold edges to the center while rotating the ball to create surface tension, and place seam-side up in a floured proofing basket or towel-lined bowl. Proof at room temperature until puffy—30 minutes to two hours—or retard in the refrigerator for 8 to 12 hours to develop flavor and accommodate scheduling.
Beginners struggling with tension building can practice the folding motion using Play-Doh or modeling clay. Fold the top third to the center, rotate 90 degrees, and repeat three additional times to create a taut skin without tearing the dough surface.
Baking in Dutch Oven
Preheat your oven to 450°F (232°C) with the empty Dutch oven inside for at least 30 minutes. Score the proofed dough top with a lame or razor to control expansion. Carefully place the dough into the hot pot, cover with the lid, and bake 20 minutes. Remove the lid and continue baking 20 to 30 minutes until the crust reaches deep mahogany and the internal temperature hits 208°F. Cool on a rack for one to two hours before slicing to prevent gummy texture.
Dough at 75% hydration or higher feels sticky and challenging to handle. This texture is normal and desirable for open crumb structure. Use wet hands for stretch-and-folds and rice flour for dusting proofing baskets to prevent sticking without adding excess white flour that tightens the dough.
Best Flours and Hydration Levels for Sourdough
Flour Types
High-protein bread flour between 11% and 13% gluten content provides the structural integrity necessary for trapping fermentation gases. Feasting at Home notes that substituting 10% to 20% whole wheat flour adds nutty complexity, though exceeding 20% whole grain produces denser crumb. Avoid low-protein all-purpose flour for initial attempts, as it yields less oven spring and flatter loaves.
Hydration Guide
Seventy to seventy-five percent hydration—where water weight equals 70-75% of flour weight—offers beginners the optimal balance between manageable dough handling and adequate steam generation. Higher hydration levels above 80% create more open, irregular crumb structures but require advanced shaping techniques to prevent spreading. Seventy percent hydration feels slightly sticky but forms a coherent ball, while 80% spreads significantly and demands banneton support.
Check flour packaging for protein percentages. Brands like King Arthur All-Purpose contain 11.7% protein, making them suitable for sourdough, while other all-purpose brands with 9-10% protein produce weaker dough structure and should be avoided for artisan loaves.
Troubleshooting Common Sourdough Issues
Dense Crumb Fixes
Dense texture typically indicates underfermentation from weak starter activity or cold kitchen temperatures, or conversely, overproofing that exhausts yeast strength. Ensure your starter doubles within four to six hours before mixing dough. Verify complete bulk fermentation until the dough jiggles and doubles. Maintain strong tension during shaping and preheat the Dutch oven fully to 450°F with adequate steam time.
Starter Activity Checks
If your starter shows no bubbles, discard half the volume and feed using a 1:2:2 ratio (starter:flour:water) repeatedly for two to three days at 75°F. The float test—dropping a spoonful of starter into water—indicates readiness when the mass floats. Lack of oven spring usually stems from weak leaven or insufficient surface tension during shaping.
How Long Does It Take to Make Sourdough Bread?
- 8:00 AM: Build levain (or activate starter) — 5-6 hours fermentation
- 2:00 PM: Mix dough and autolyse — 30-60 minutes rest
- 3:00 PM: Perform stretch-and-folds — 2 hours (4 sets at 30-minute intervals)
- 5:00 PM: Bulk ferment remainder — 2-4 hours until doubled
- 9:00 PM: Divide, preshape, and final shape — 30-45 minutes
- 9:45 PM: Proof or cold retard — 1-2 hours room temperature OR 8-12 hours refrigerator
- Next Morning: Bake in Dutch oven — 45-60 minutes plus 2-hour cooling
Cooler kitchens below 70°F extend bulk fermentation by two to four hours. Using a proofing box or oven with the light on maintains the ideal 74-76°F range.
What Variables Affect Sourdough Outcomes?
| Established Factors | Variable Conditions |
|---|---|
| Starter feeding ratio of 1:1:1 maintains equilibrium | Exact doubling time varies by kitchen temperature (70-78°F range) |
| 450°F bake temperature produces proper crust | Flour absorption rates differ by brand and humidity |
| 208°F internal temperature ensures doneness | Autolyse duration may extend to 2 hours for whole grains |
| 75% hydration standardizes beginner recipes | Starter acidity affects final flavor intensity unpredictably |
| 2% salt content controls fermentation speed | Altitude above 3000 feet requires hydration adjustments |
Historical and Scientific Context of Natural Leavening
Sourdough fermentation predates commercial yeast production by millennia, relying on the symbiotic relationship between Saccharomyces cerevisiae wild yeasts and Lactobacillus bacteria. These microorganisms produce carbon dioxide for rise and lactic acid for flavor preservation. Unlike domesticated baker’s yeast, wild cultures adapt to local flour microbiomes, creating regionally distinct flavor profiles. Common mistakes include rushing fermentation before full gluten development or adding salt directly to starter rather than final dough. Can Dogs Eat Nuts
Expert Sources and Methodology
This guide synthesizes tested methodologies from established baking authorities including The Clever Carrot’s decade-long sourdough documentation, King Arthur Baking’s laboratory-tested fermentation data, The Perfect Loaf’s professional bakery techniques, and verified home-baking tutorials from Alexandra Cooks, Feasting at Home, and Pantry Mama. All temperature ranges, hydration percentages, and timing specifications derive from documented bake logs rather than theoretical projections.
Essential Takeaways for First-Time Bakers
Success requires maintaining consistent fermentation temperatures, exercising patience through the full bulk rise, and developing surface tension during shaping. Start with 75% hydration and bread flour before experimenting with whole grains or higher water content. The Dutch oven method eliminates complex steam-injection equipment while producing professional crust quality. How to Open a Can Without a Can Opener
Frequently Asked Questions
How do I store sourdough bread?
Wrap cooled loaves in linen or cotton bags and store at room temperature for 2-3 days. Avoid plastic bags which soften crust. Freeze sliced portions for longer storage rather than refrigerating.
Can I use all-purpose flour for sourdough?
Yes, if the protein content exceeds 11%. Standard all-purpose with 9-10% protein produces flat, dense loaves. Check brand specifications or blend with bread flour.
What temperature should I bake sourdough?
Preheat to 450°F (232°C) with the Dutch oven inside. Bake 20 minutes covered, then reduce if needed to 425°F for final 20-30 minutes uncovered.
How often must I feed my sourdough starter?
Daily at room temperature during active use. Weekly when refrigerated using 1:1:1 ratio. Discard half before each feeding to maintain acidity balance.
Why does my dough stick to the basket?
High-hydration dough adheres to bare linen. Use rice flour for dusting—it prevents sticking without being absorbed like wheat flour.
Is a levain necessary if I have active starter?
No. The levain build—mixing 38g starter with fresh flour and water—is optional for schedule flexibility but not required for direct mixing.
Can I bake without a Dutch oven?
Yes, though results vary. Place a cast iron skillet on the lower rack and add ice cubes immediately after loading the bread to generate steam.
More related posts
 M. Emmet Walsh: Actor Bio, Movies, Death (1935-2024)
 Gone with the Wind: Controversy, Quotes, Box Office & More
 It Could Happen to You (1994) True Story: Fact vs Fiction
 E-ZPass Toll Text Scam: How to Spot and Report Smishing
 Gemini AI Photo Prompt: Complete Guide with Templates
 Alabama Crimson Tide Football: Nickname, Playoffs & Rivalry
 Love Island Games Cast: Season 1, 2 Full Lists & Updates
 Limited Edition Stanley Cup: Rarity, Resale Prices & Fakes
